Integration guide
Integration video
To get started you can follow the integration video, or follow the steps below.
Step 1
Create a new project
To get started login or signup on the AIProxy dashboard. Then create your first project and give it a name.
Step 2
Setup DeviceCheck (iOS and MacOS only)
If your building for iOS or MacOS we highly recommend setting up DeviceCheck for added security. To set it up tap the DeviceCheck tab in the left sidebar and click "configure".

Add your P8 file, DeviceCheck Key ID, and Apple Team ID which you can find on your Apple Developer Account. Watch the quickstart video to see how to find them.

Click "Save settings" and you're finished setting up DeviceCheck in the dashboard.
Step 3
Add a Service
We refer to APIs as "Services" in our dashboard. To add a new service tap on the Services tab in the sidebar and click "Add new service."

Next, provide the base domain you would to proxy. For ex. the base domain for OpenAI is api.openai.com. You can also choose to allow requests to all endpoints, and whether you want to enable DeviceCheck (recommend for iOS and MacOS apps).

Step 4
Generate a new key
With your service added you can now generate a new AIProxy partial key by navigating to the "API keys" tab from the service page. Enter a name and your OpenAI key and click the "Create key" button.

Give your key a name, and enter the API key. Note, we don't store your key. Instead, we store part of an encrypted message that can used to derive your key.

Step 5
Add AIProxy to your app
At this point you're ready to start integrating AIProxy into your app. If you're using OpenAI we've built a Swift client that makes it easy to integrate. Here's how:
- Add the AIProxySwift package to your Xcode project and follow the directions on the GitHub README. Make sure you are using version 0.3.0
- Initialize using the code generated on the key details screen.
- Add an AIPROXY_DEVICE_CHECK_BYPASS env variable to Xcode. This is necessary for the iOS simulator to communicate with the AIProxy backend.
- Type cmd-shift-comma to open up the "Edit Schemes" menu.
- Select Run in the sidebar
- Select Arguments from the top nav
- Add to the "Environment Variables" section an env variable with name AIPROXY_DEVICE_CHECK_BYPASS and value displayed on the key details screen.

If you don't want to use the AIProxySwift package you can use the SwiftOpenAI package instead. For sample requests visit the Swift examples page.
Step 6
Configure Xcode for DeviceCheck
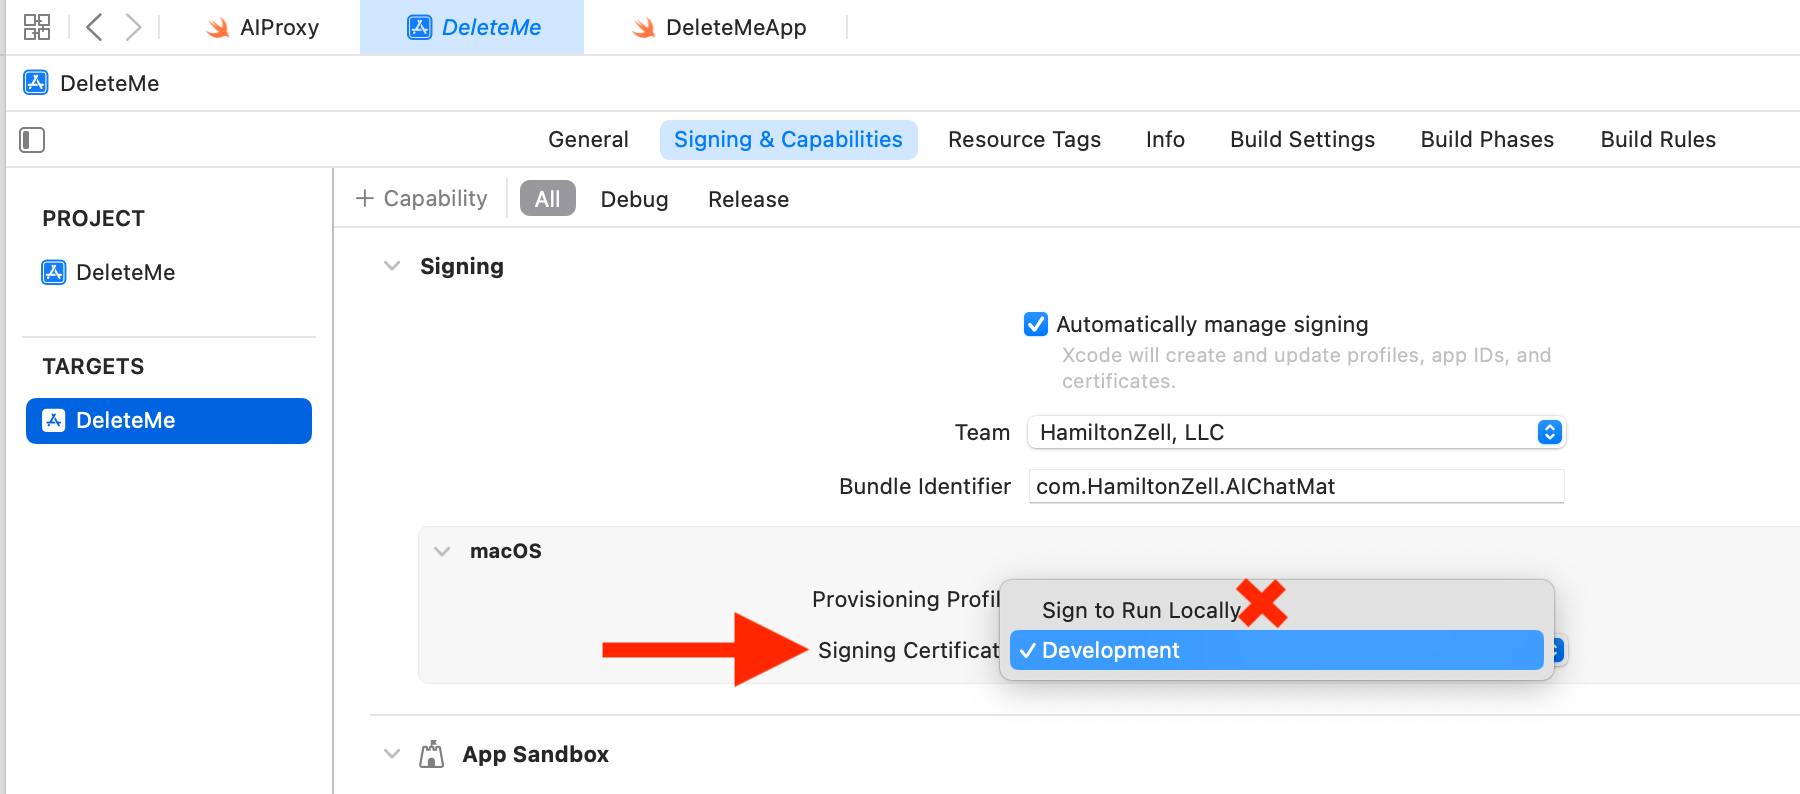
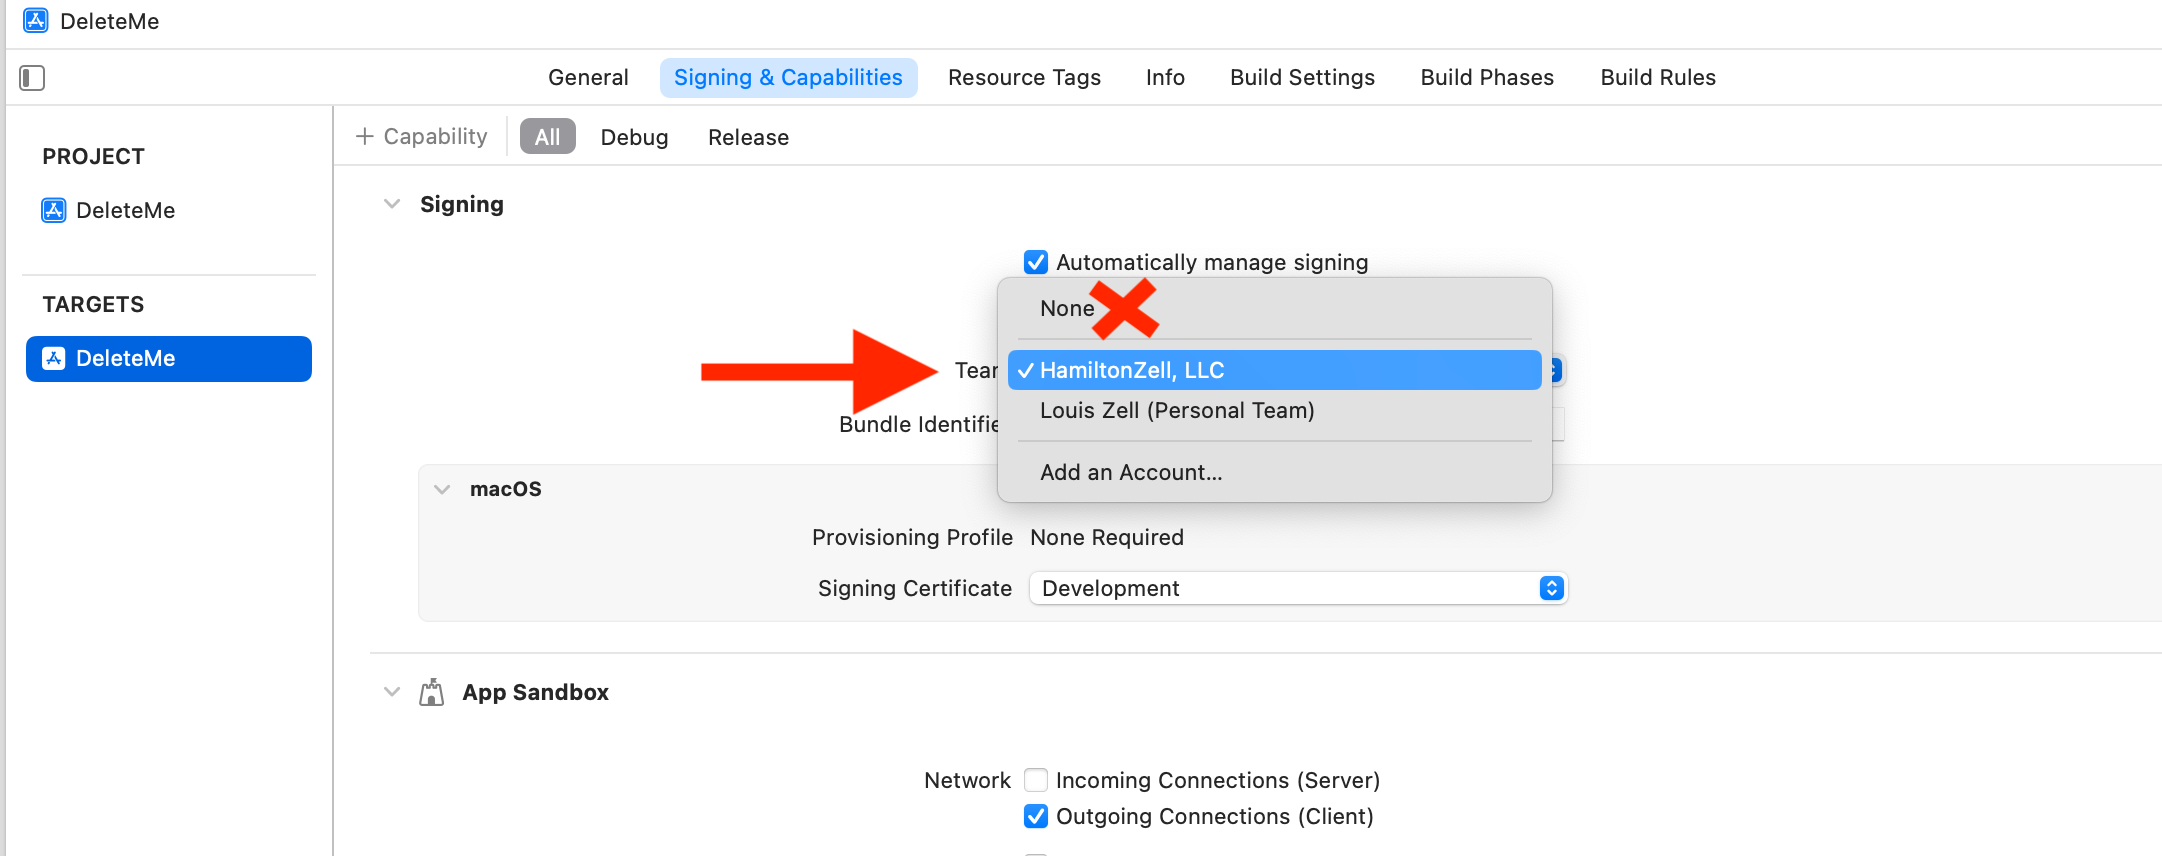
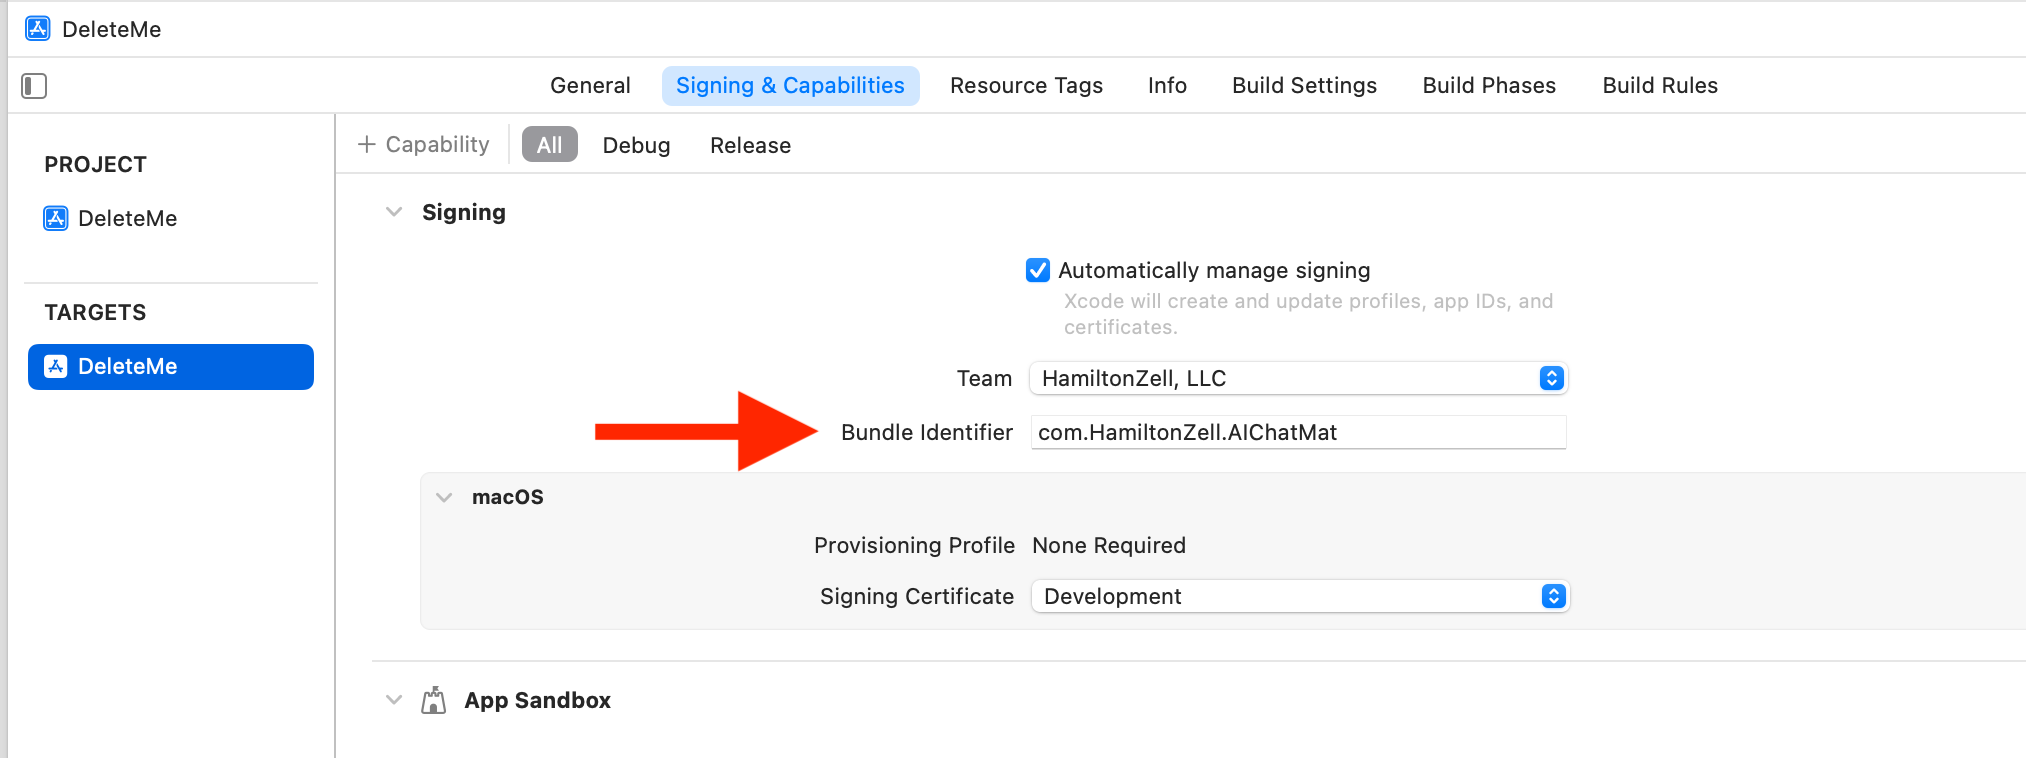
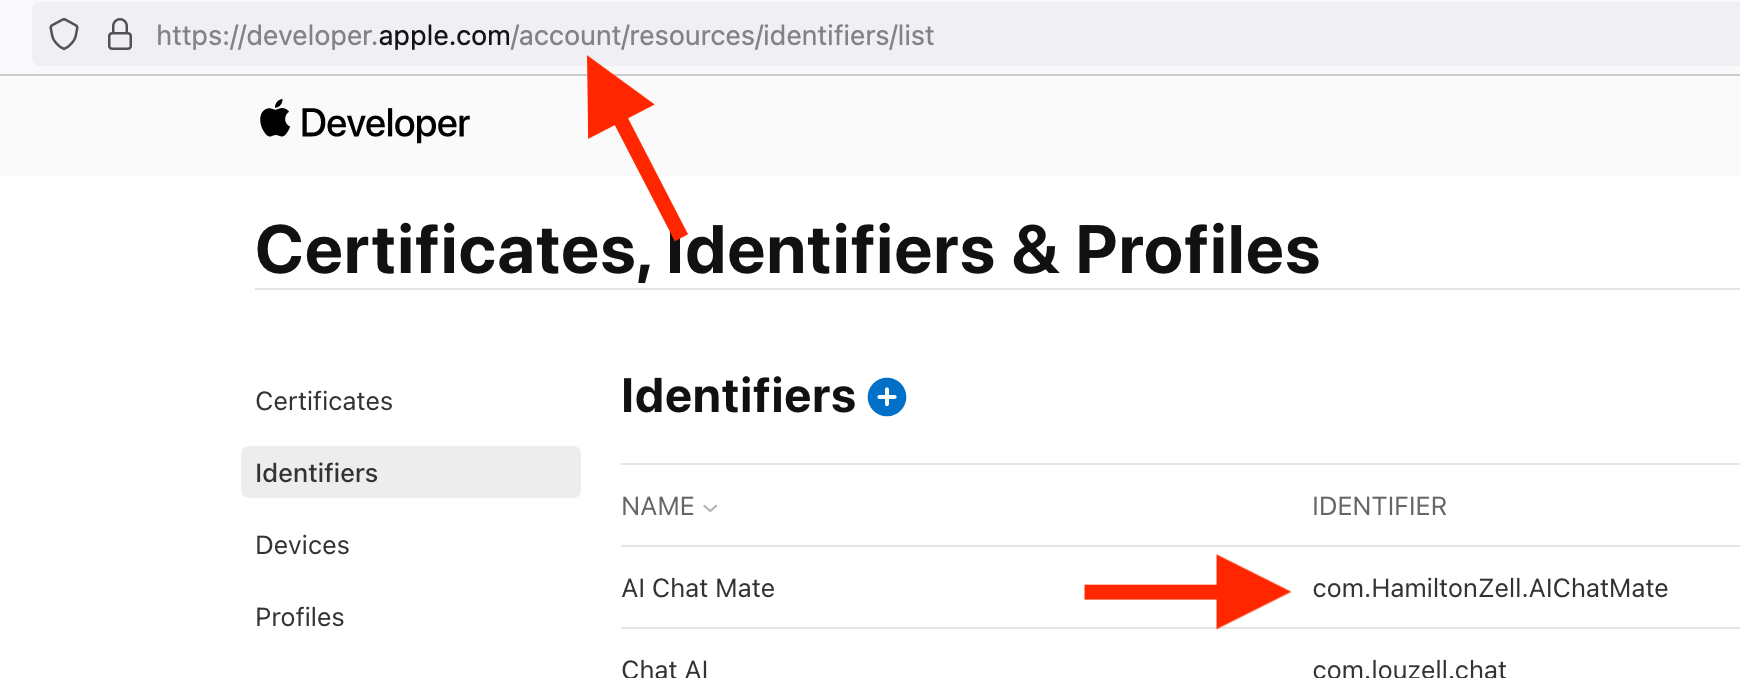
An integral layer of security for AIProxy is Apple's DeviceCheck. A successful DeviceCheck integration requires the following:
1. Your Apple developer team must be selected under the 'Signing & Capabilities' tab in Xcode
2. The bundle identifier of your app must be explicit (i.e. it can't contain a wildcard)
3. The bundle identifier of your app must be listed as an App Identifier
4. On MacOS, your signing certificate can't be set to 'Sign to Run Locally'